Congratulation, you just entered to the backend of your WordPress website.
You, as the Administrator (Admin role), are the only one that can actually see this screen.
The front end of your website (the way your visitors see the site) is different than the backend.
From the back end, you can control most things related to your website.
You can:
- Create new pages
- Create new posts
- Upload media files such as images and videos
- Install themes
- Install plugins
- Change WordPress settings
- Add users
- Edit your user profile
- Much more…
The backend of your WordPress website contains two bars.
The first bar called the Admin bar and the second one is the backend sidebar.
The Admin Bar
The Admin bar is located at the top of the screen.
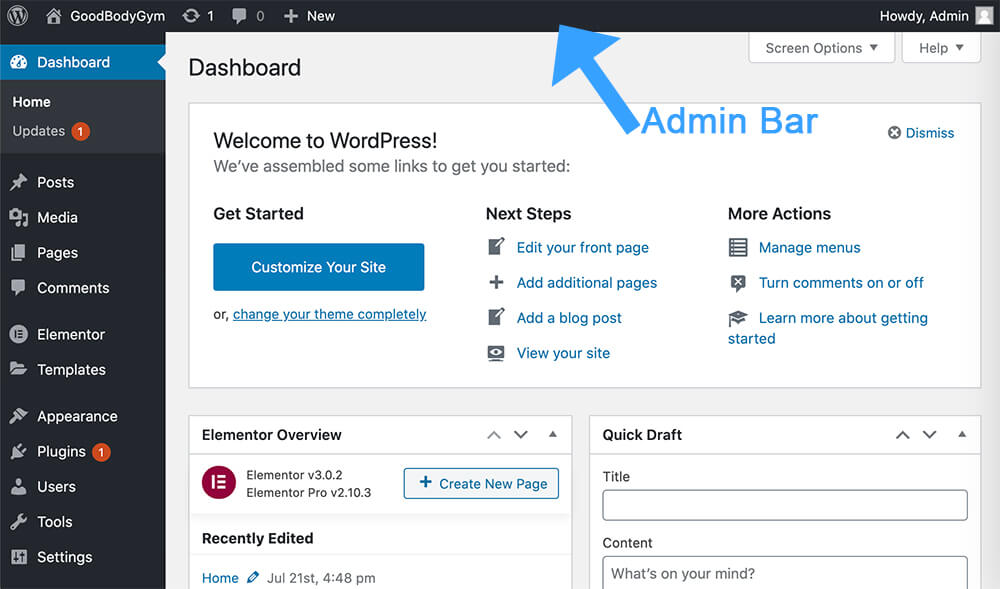
The admin bar will also be available for you even in the front-end of your website as long as you logged-in.
With this bar, you can quickly create new pages or posts, access the customization screen or the backend of your website, and see if there are any updates available.
The Sidebar
The sidebar of your WordPress dashboard is located on the left side of the screen.
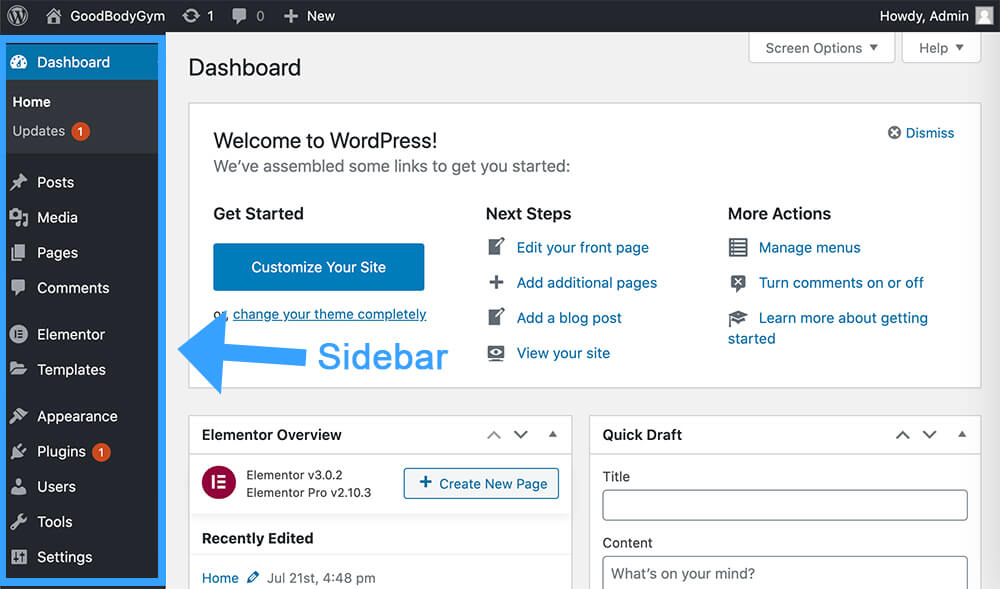
Unlike the admin bar, the sidebar is only available when you are at the backend of your website.
From the sidebar, you can access every part of your website. You can edit all your pages, posts, media, install plugins and themes, change WordPress setting and etc.
WordPress Settings
The first thing that we should do with every new WordPress site is to change some of the settings.
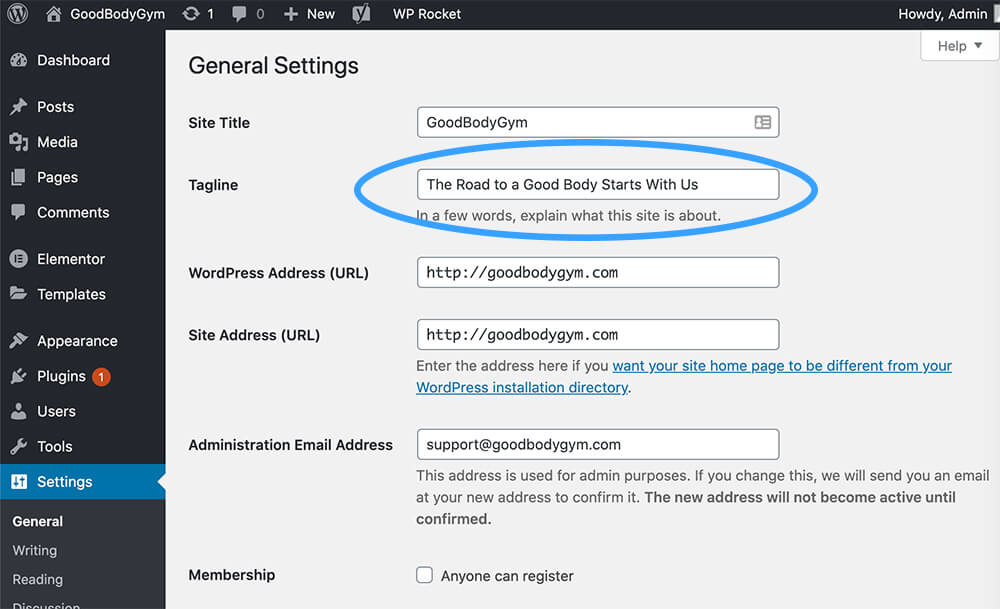
Site title and address
First, we will change the site title and the website URL address.
To do just that, navigate to Settings -> General.
On this screen, you can change the site title and the tagline.
Note: When we installed WordPress in the previous section we entered a site title. We can change it now to anything else we want from inside the settings screen.
In the WordPress Address (URL) and the Site Address (URL) make sure to replace the HTTP protocol to HTTPS.
The S letter means Secured. When we registered our website with Hostgator, they automatically added an SSL certificate and made our website secured.
You also have the option to add WWW to both fields, if you want.
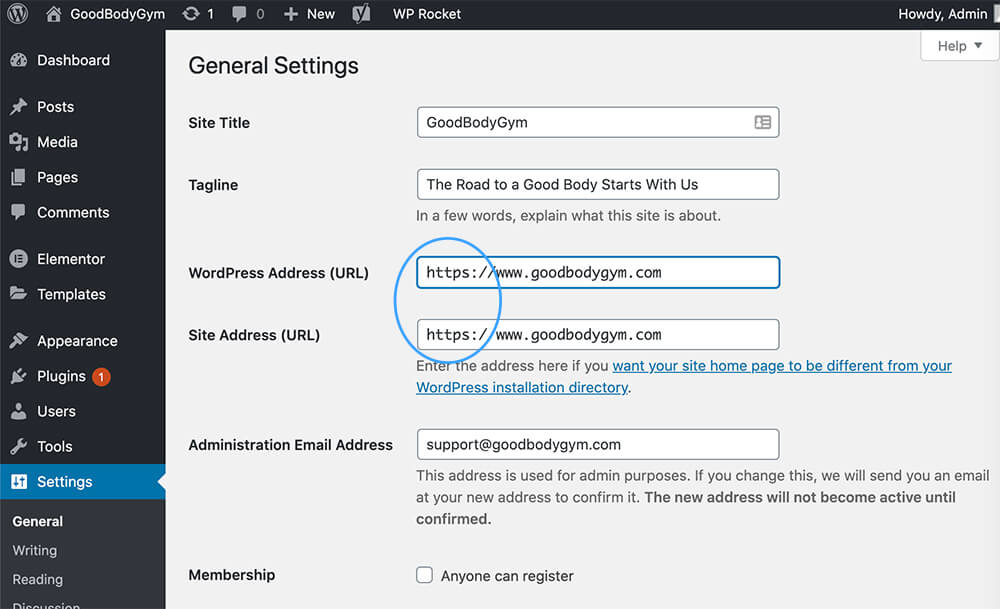
When you done with the changes, scroll to the bottom of the page and click ‘Save Changes’.
Website permalinks
Website permalinks are your pages and posts address URLs.
Every page and post in WordPress is getting assign with a unique ID.
Without changing the WordPress default permalinks, the ID of the page will be part of the address URL.
For example, after creating a new page called ‘About Us’, by default, the page will be accessible through the example.com/id=123 URL link.
This is not very user-friendly or good for SEO whatsoever.
It will be smarter to change the permalinks of the website to make it easier to navigate and remember.
To do that, navigate to Settings -> Permalinks and change the option to Post name.
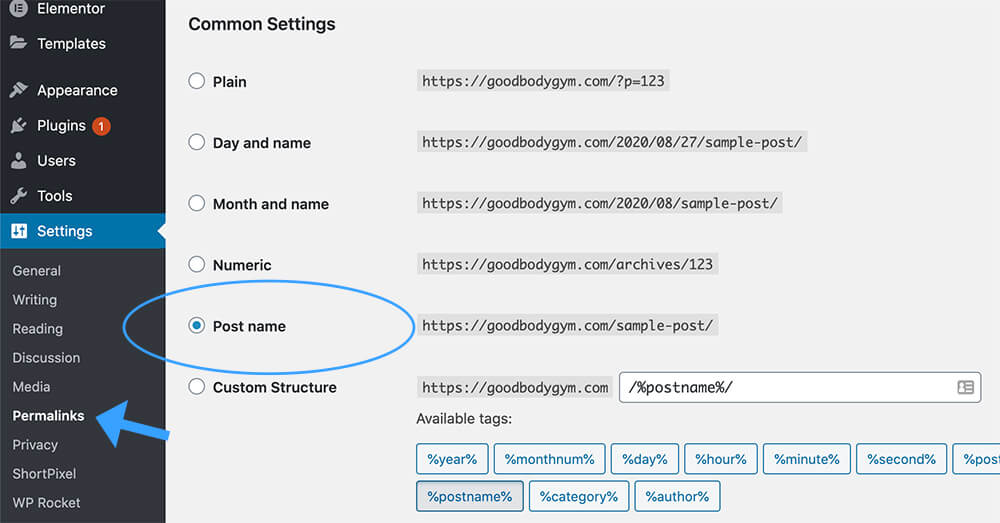
That way, the About Us URL link will be changed to example.com/about-us which is way better for visitors and search engines altogether.
Make sure to scroll down the page and save the changes.
In the next lecture, we will talk about themes, what are they, and how to install them.
Conclusion
In this tutorial, we explored and went through WordPress backend. In the next tutorial, we will learn about themes, what they are, and how to install them.