WordPress is the most popular CMS (Content Management System) platform to build websites and blogs.
In this section, we will talk about WordPress, what is it, and how to install it.
What is WordPress
As I said above, WordPress is the most popular platform to build websites online.
In fact, over 38% of all websites are running on WordPress. That’s extremely high.

Some of the websites that you probably know that are using WordPress are:
- Sony music
- Beyonce
- Katy Perry
- The Walt Disney Company
- Boingo
- Many more
There are many different platforms that will let you build websites such as WIX, Shopify, Squarespace, and many others but WordPress is known as the best for a few main reasons:
- Open-source software – because WordPress is an open-source platform, developers from around the world started to study the code, modify it, and improve it. A big, vibrant community started to revolve around WordPress. That created hype and caused more and more people to join and try the software.
- Beginners friendly – While in the past it was really challenging to build a website (you needed to know PHP, HTML, CSS, JS and etc), WordPress made it easy to build beautiful and professional looking websites without the need to know any coding skills.
- Plugins – One of the things that escalated WP above their competitors is the large repository of plugins. Plugins (similar to smartphone apps) will expand the functionality of WordPress (we will talk more about it in the plugins section).
- Flexible – While other platforms are known for a specific task (Shopify – to build eCommerce store or Clickfunnels to build funnels), WordPress is not limited to one use and can do it all with the right plugins.
Now that you know why WP is the best platform to build a website, it’s a good time to install it on your domain.
Install WordPress
After registered with HostGator, it is very easy to install WordPress on your domain and can be done easily with one click.
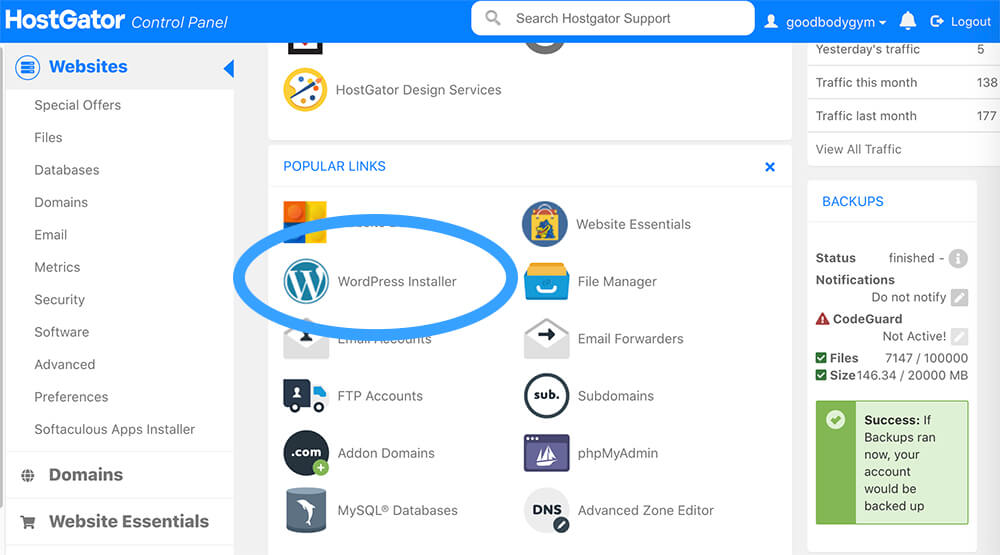
From your hosting cPanel, click on the WordPress Installer button.

In the Select Domain For Installation screen choose the domain name that you purchased, leave the directory empty and click Next.

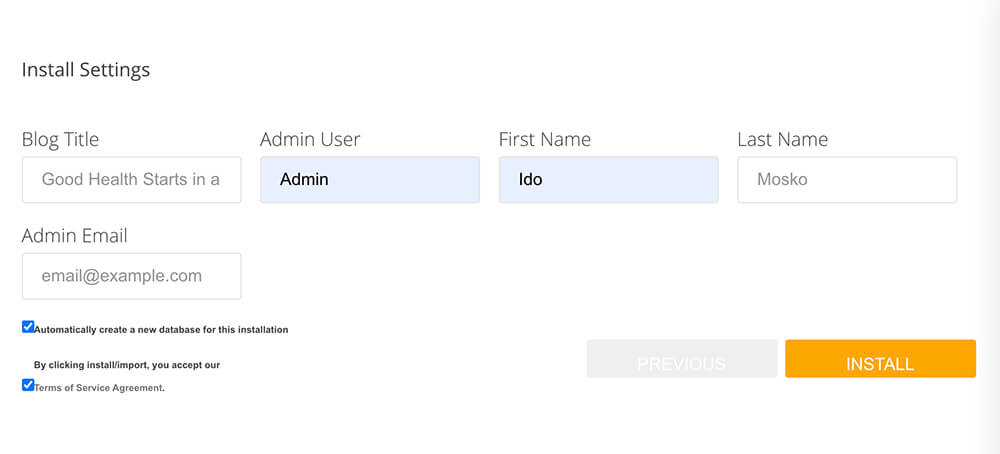
In the next screen, you’ll need to fill some relevant information regarding your websites such as blog title, admin user, first name, last name, and email address.
For example, if you have a gym website, the blog title can be: ‘Good Health Starts in a Healthy Body’.

Note: You’ll need an Admin username and a password to log in to WordPress. You can set the admin user name on this screen but can’t set a password. WordPress will generate an automatic password for you that you can change later if you desire.
After filling the necessary information, click on the Install button.
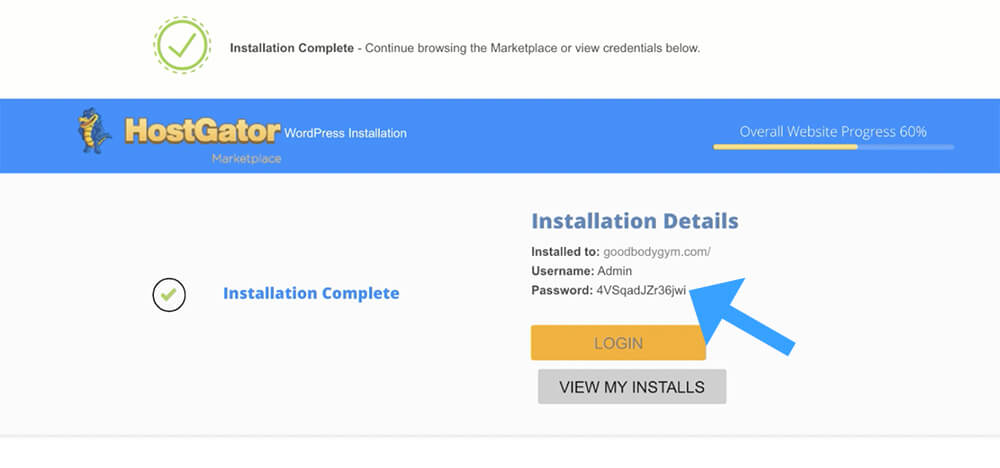
On the next screen, HostGator will install WordPress on your domain name (it’s a process that will take only a few minutes) and will provide you with your admin password.

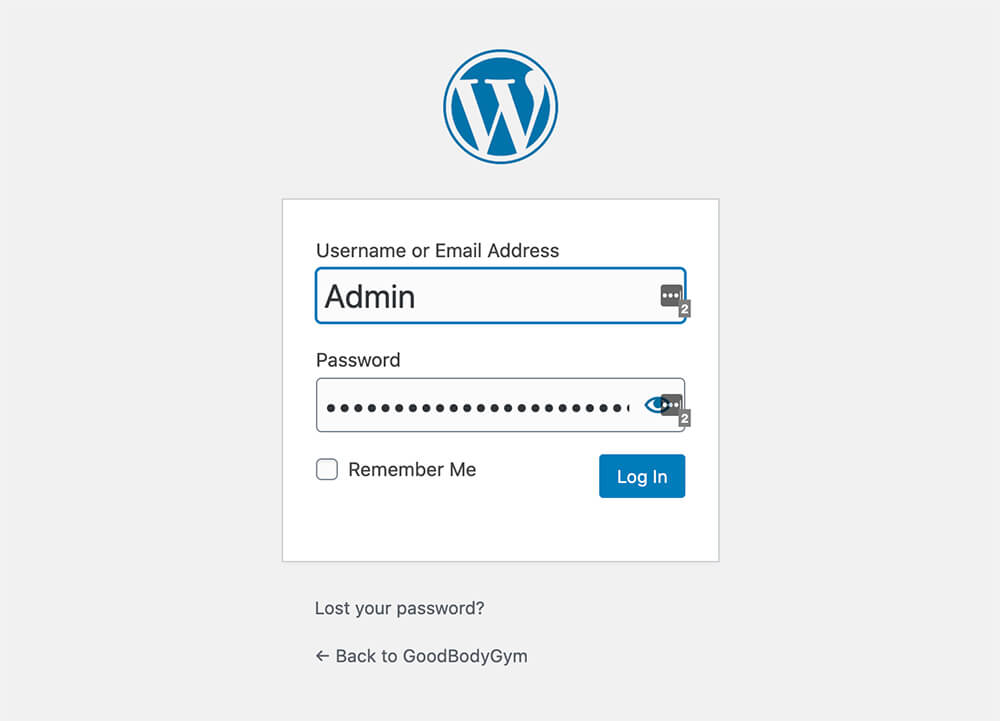
After you finished installing WordPress, click on the Login button, or navigate to your domain name followed by /wp-admin like:
example.com/wp-adminEnter your Admin username and password and click on ‘Login’.

In the next class, we walk through and review the backend of WordPress
Conclusion
In this tutorial, we have learned how to install the WordPress CMS platform on our domain name through the cPanel.
In the next tutorial, we will explore and walk through the backend of WordPress.

