Elementor is the best and the most popular page builder plugin for WordPress.
It comes loaded with a variety of block elements (widgets) to help you customize and edit your website.
To launch the Elementor screen, navigate to any of your website’ pages and click on Edit With Elementor.
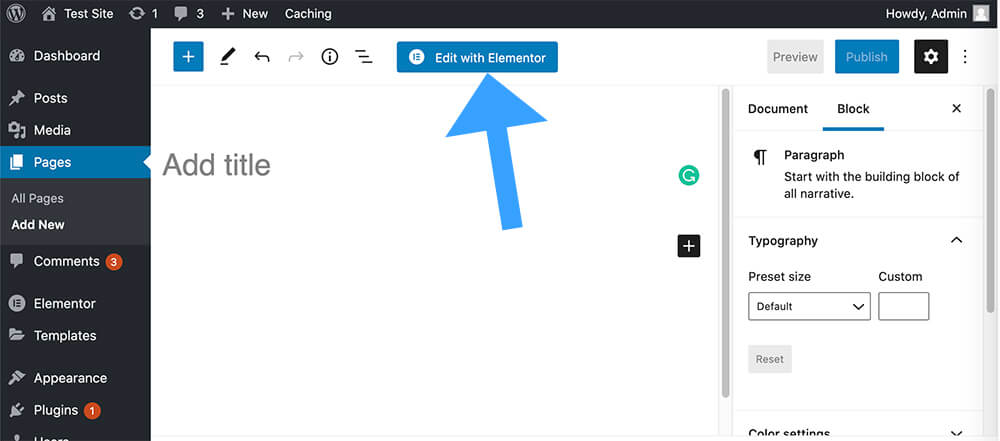
Clicking on this button will take you to the Elementor screen where you can start by loading a template or using a blank one.

Feel free to browse all the templates they have and get some inspiration. If you found a nice template you can click Insert and start to edit it.
Because you don’t know how to use Elementor yet, it will be more beneficial for you to exit the templates screen and start fresh without any template.
Instead of clicking on the folder icon, click on the plus icon, and chose your desired section layout.
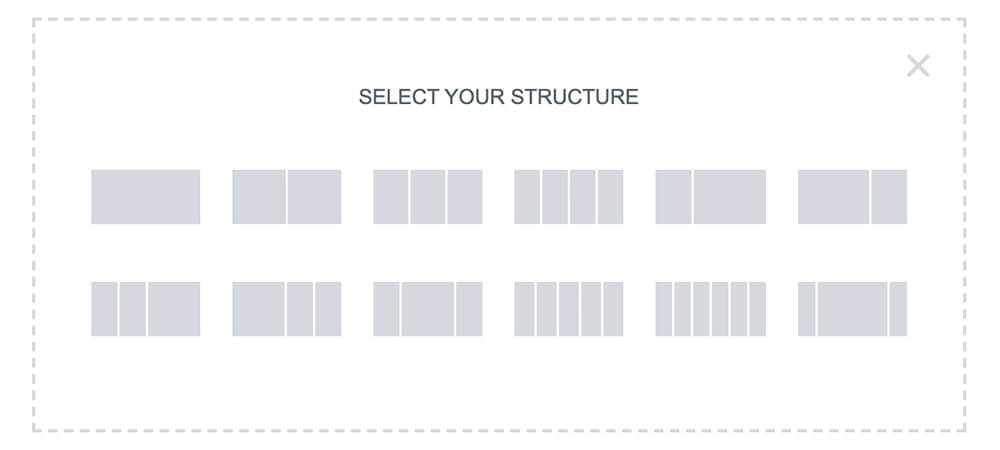
In our example, I will choose a section with only one column.
The screen in front of you is containing two parts.
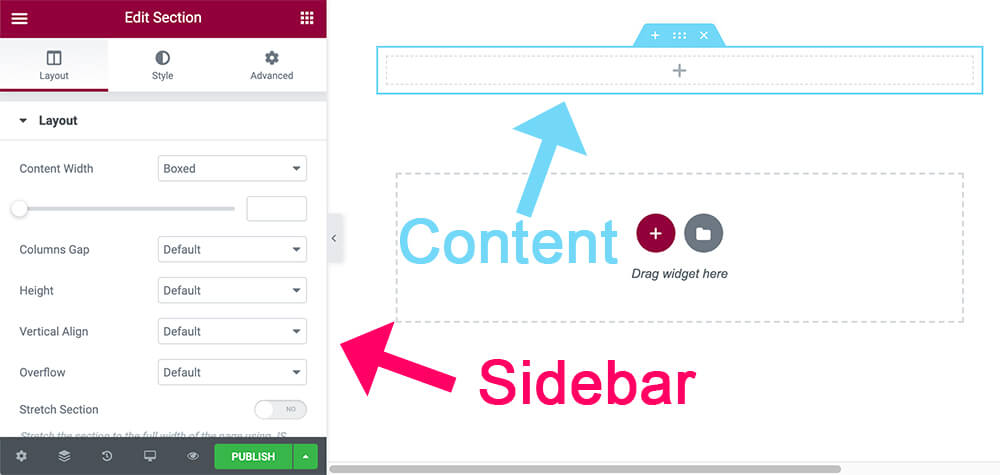
The first part is the Elementor sidebar on the left where you can control every section, column, or widget settings such as content and style.
The second part, the part on the right is the page itself, the content area, that’s what your page looks like.
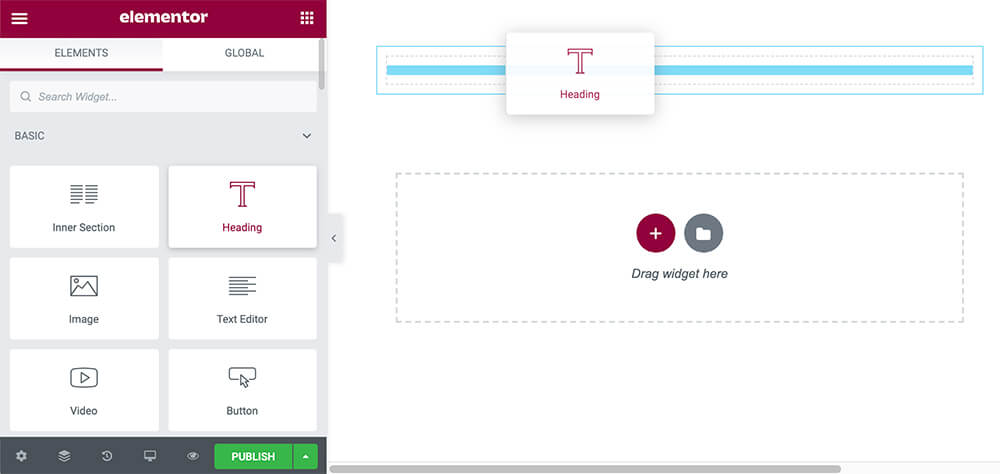
Click on the widget icon to see the full list of the available widgets.
![]()
Now, drag any of the widgets from the left sidebar into the column inside the new section on the right.
Elementor is following the web fundamentals principles that we talked about in the previous lecture.
Every new section of Elementor is built with three components.
- Outer section – taking 100% full width of the page.
- Inner section (columns) – taking 1140px and positioning in the middle of the outer section.
- Element (widget) – taking the full width inside the column.

The outer section has a light blue border. The inner section has a grey border and the widget inside the column has a light blue border (similar to the outer section).
When using the Hello Elementor WordPress theme, every time you’ll edit your page with Elementor, the outer section will take the full width of the page, 100% left to right.
By default, the inner section (the columns) is taking 1140px and positioning in the middle of the outer section.
You can change the column width for each of the sections individually when editing your pages or change the default width for all by navigating to Elementor -> Settings -> Style -> Content Width and change the number there.
To access the editing sidebar of the outer section, click on the settings icon that touching the outer blue border.

To open the editing sidebar of the inner section (column), click on the dark grey square at the top left corner inside the column.

To edit the widget, just click on the widget itself or on the light blue square at the top right side inside the widget.

Every section, column, or widget comes with three tabs inside the edit sidebar.
- Layout (for sections and columns) or Content (for widgets).
- Style.
- Advanced.
The Layout / Content tab will provide you with different options from one section or element to another based on what you are editing.
For example, inside the content tab of the image widget, you’ll be able to choose an image and inside the content tab of the text editor widget, you’ll need to enter text.
The style tab is in charge of the style of the section or the element. From inside the style tab, you’ll be able to change the colors, background colors, text size, fonts, line heights and etc.
Inside the Advanced tab, you’ll find all the other settings that didn’t fit in the other two tabs like set a margin or padding, give classes or ID, animation, hide on different screen sizes and etc.
Feel free to play around and add more sections and widgets. That what’s Elementor is good for. It is so easy and quick to build and design websites and if you don’t like it, delete and start again.
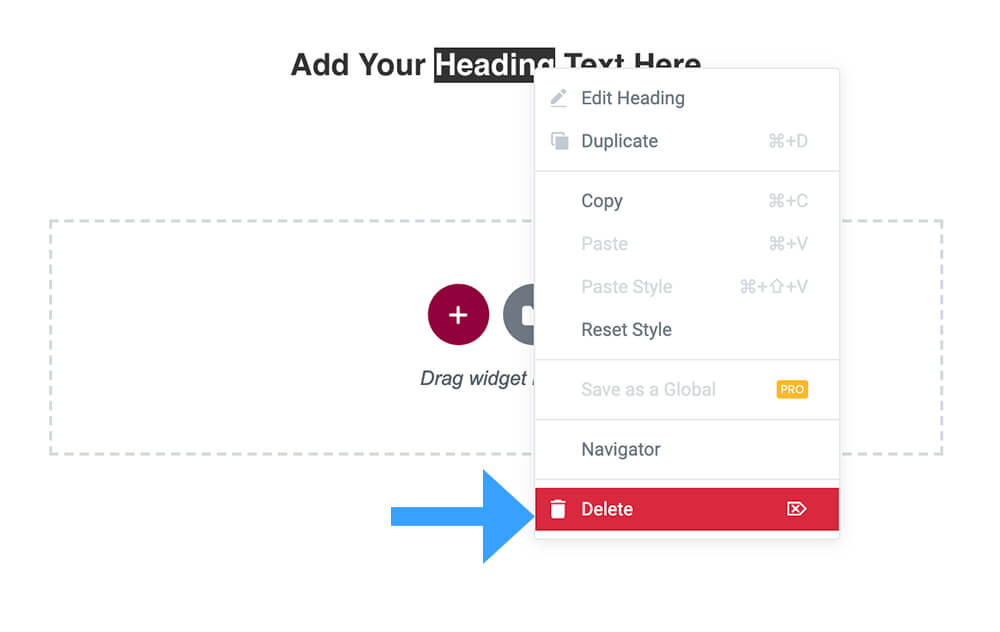
To delete and section or a widget, simply right-click on the section or the element that you would like to delete and hit Delete.
Take your time now to play around and experiment with Elementor. It is really fun. In the next lecture, we will start building our website’s header.
Conclusion
In this tutorial, we explained the Elementor page builder basics and implemented the principles that we learned in the previous tutorial.
Next, we will build our website header.

