WordPress plugins are extensions to expand the functionality of your website.
Think about plugins just like apps for a smartphone.
For example, out of the box, your new smartphone will not come with the Angry Birds game installed. However, you will be able to buy and download the game from the App Store or Google store and install it on your phone.
WordPress plugins are the same. The default version of WordPress comes with only a few plugins but you can get and download more plugins from the WordPress plugin repository.
Different plugins will help you to achieve different tasks.
For example, the WooCommerce plugin will help you to sell psychical and digital products and to charge customers through PayPal or credit cards. On the other hand, the Yoast plugin will help you to improve your content SEO and help you to rank higher in search results.
Delete WordPress plugins
Some plugins came pre-installed with your WordPress installation. For better speed and security performance, it’s better to delete all the plugins that we don’t need.
To delete unnecessary plugins, navigate to Plugins -> Installed Plugins.
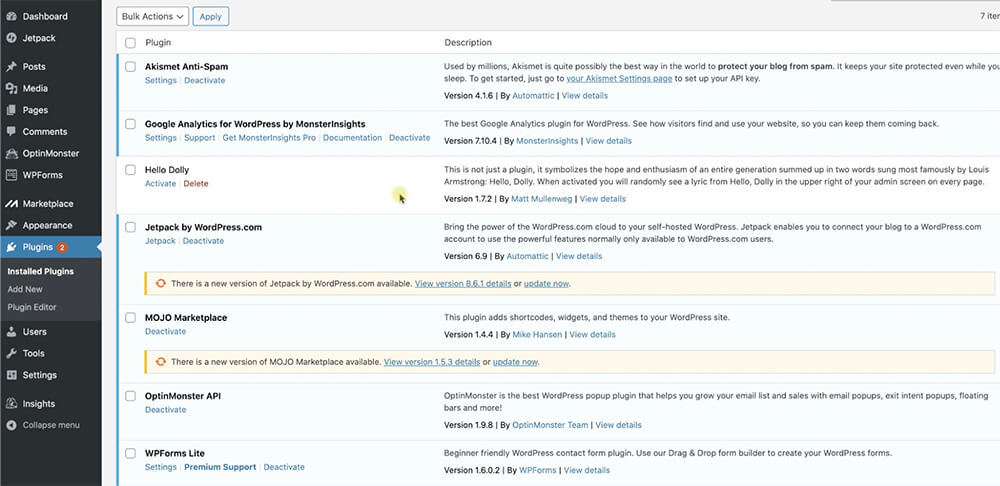
Inside the plugins’ screen, you’ll see all the plugins that you currently have on your website.
The plugins with the light blue background are active and the ones with a white background are inactive.
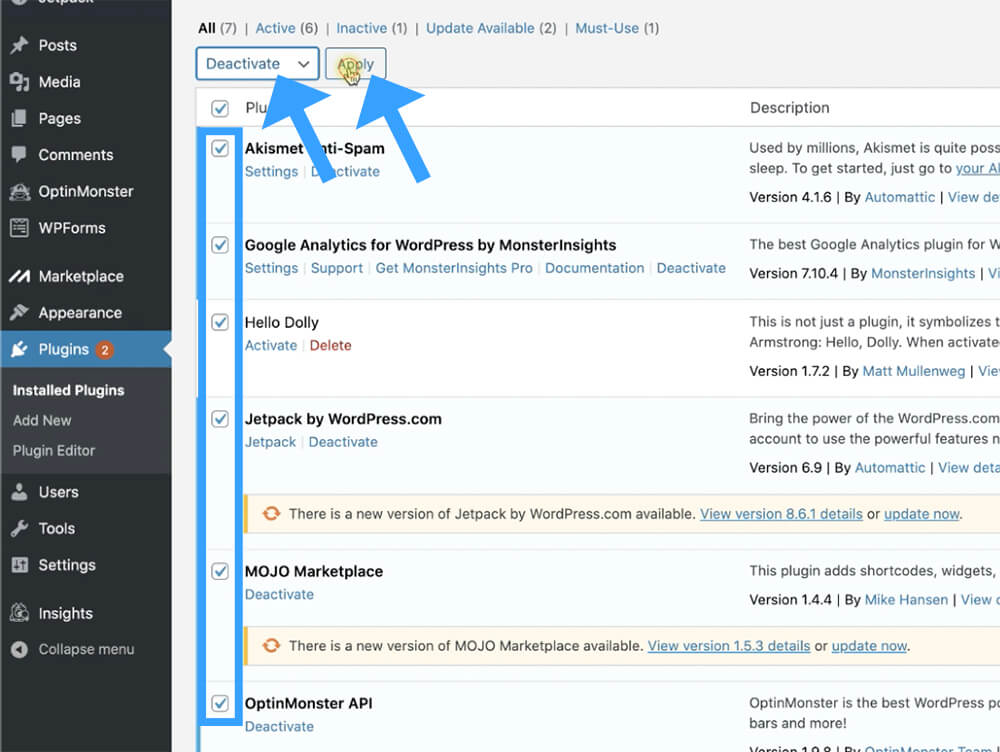
First, let’s check them all, change the Bulk Action to Deactivate, and click Apply.
After you applied the action, all the plugins should have a white background.
Then, check all the plugins once again and now change the Bulk Action to Delete.
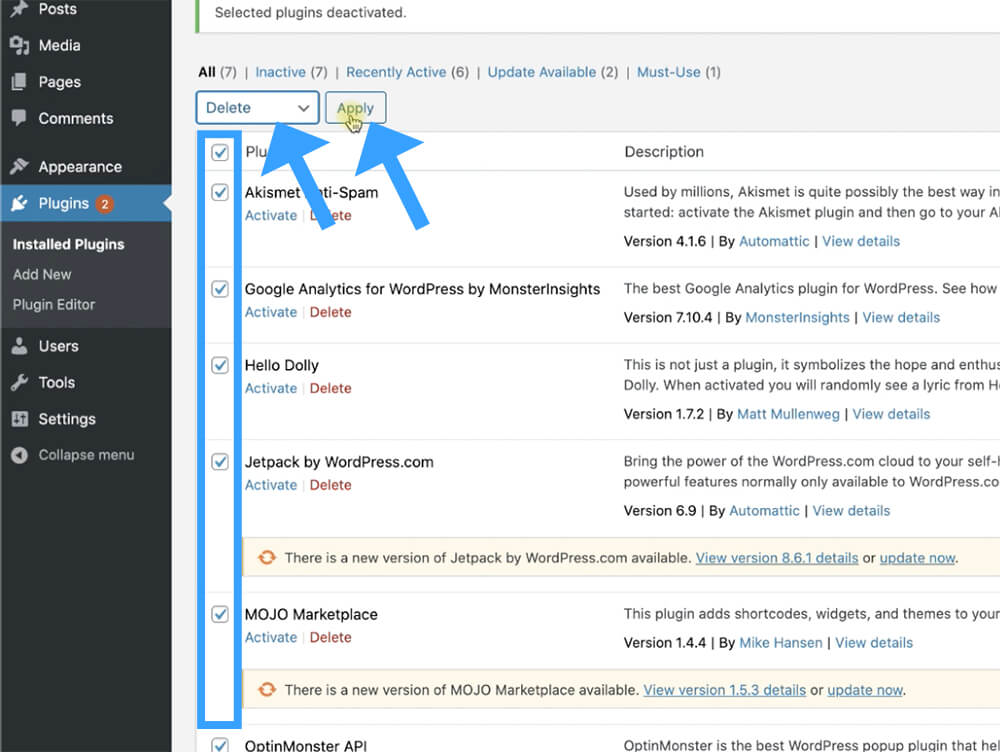
After applying the action, all the website plugins’ will be deleted one by one and will leave you with no plugins.
Install WordPress plugins
There are thousands of WordPress plugins in the WordPress plugin repository for you to install and use.
As I told you earlier in the Themes lecture, in this course we are going to use a page builder plugin called Elementor to design the website.
Elementor established itself as the best and most popular page builder plugin because it’s user-friendly, easy to use, unlimited design possibilities without the need to know even one single line of code.
To install WordPress plugins, navigate to Plugins -> Add New.
In the plugins screen, search for your desired plugin from the search bar on the right. In our case, we will search for Elementor.
The search results will display many plugins. Every plugin in its own box.
The box contains relevant information regarding the plugin such as the plugin image, name, description, user amount, reviews and etc.
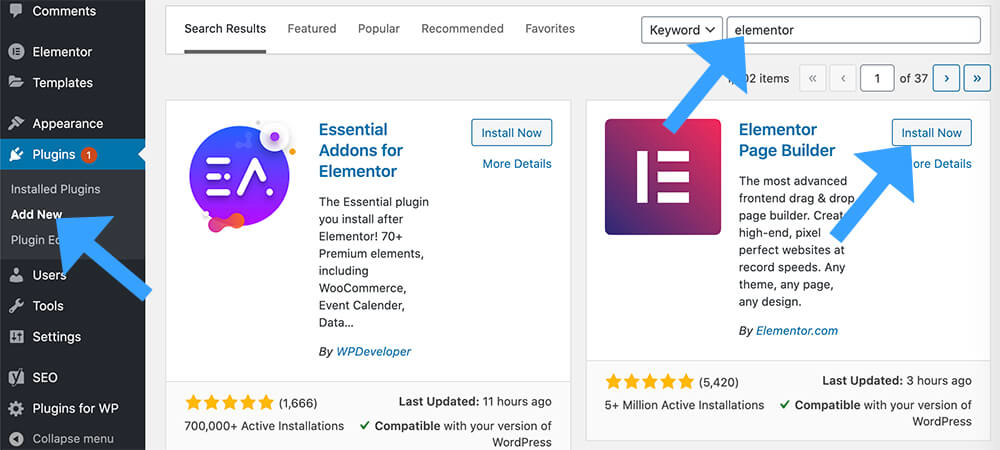
To install the plugin, click on the Install Now button and then on Activate.
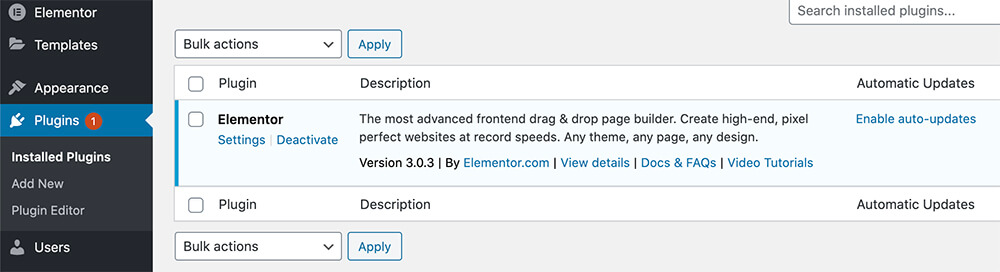
Great, now when visiting the plugins screen again, the Elementor plugin will be displayed there with a light blue background indicating that the plugin is active.
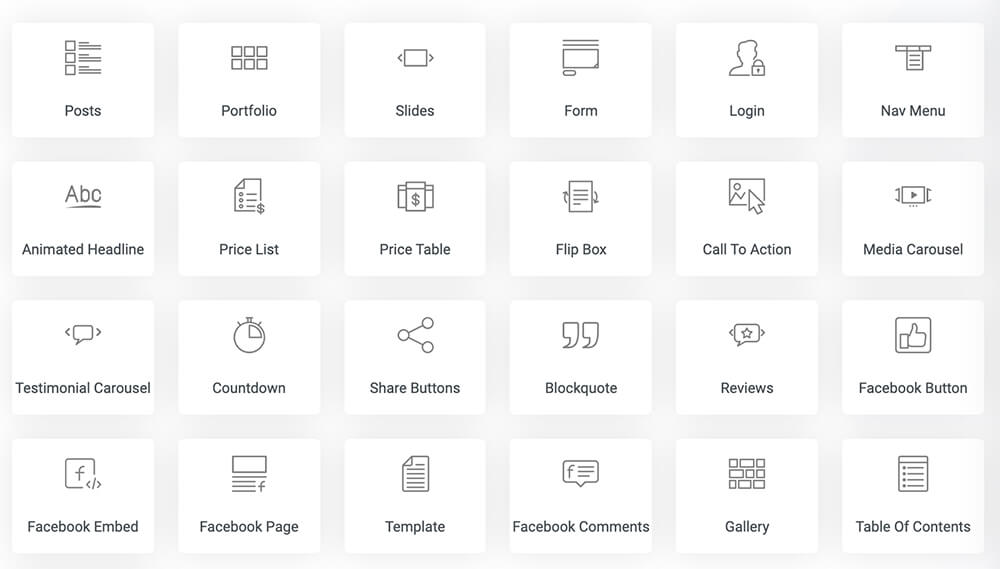
The basic version of Elementor comes with a limited amount of widgets and design options.
To really reach the full potential of your website, you will need to purchase the pro version of Elementor.
The pro version provides you with numerous amount of extra widgets such as sliders, forms, countdowns timers, share buttons, and many more.
You can see the full list in the image below. It’s also important to know that Elementor always improving and adding more widgets to their arsenal.
In addition, Elementor pro also provides you with the option to create templates that can be displayed on every chosen page.
The header and the footer sections of the website can be built as templates.
Instead of creating the same header for every page on our site (will take a lot of time and inefficient), we will create the header once as a template and will display it on every page.
The good news is that the pro version will only cost you $49 or less when running a promotion. If there is any active promotion, the link below will reflect that and will save you money.
Click here to get Elementor Pro for the best price!
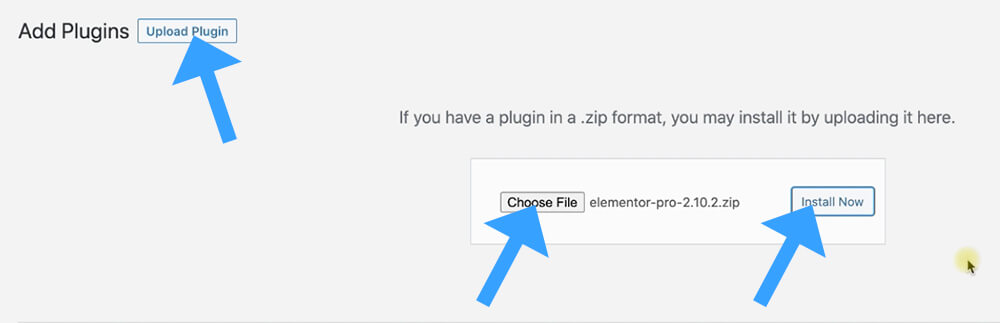
After purchasing the Elementor pro version using the link above, you’ll need to download the plugin into your computer (ZIP file).
After downloading the plugin, navigate to Plugins -> Add New and click on the Upload Plugin button at the top.
Then, click on Choose File and upload the Elementor Pro ZIP file.
Click Install and then on Activate.
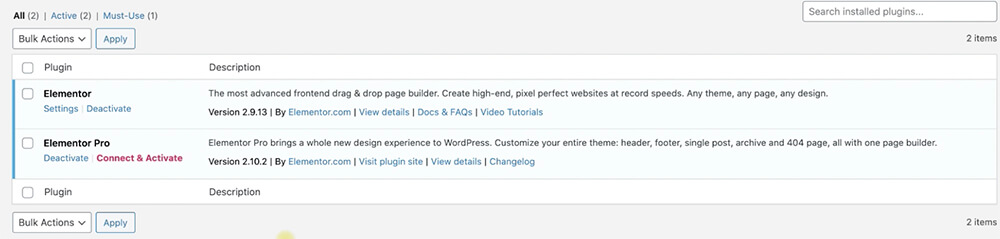
After activating the plugin, you should see both plugins, the Elementor and Elementor Pro installed and active inside the Plugins screen.
When both plugins are active, it is a great time to start using it, but before start building the website, let’s talk quickly about web design fundamentals.
Conclusion
In this tutorial, we have learned what WordPress plugins are and how to install them.
In the next tutorial, we will talk about basic web fundamentals.